05:00
Short Course on R Tools
Building Interactive Web Apps with Shiny
Introduction to Shiny
What is Shiny?
R package for interactive web apps
No web dev expertise needed
When to use: dashboards, interactive reports, teaching tools
Tutorial sources:
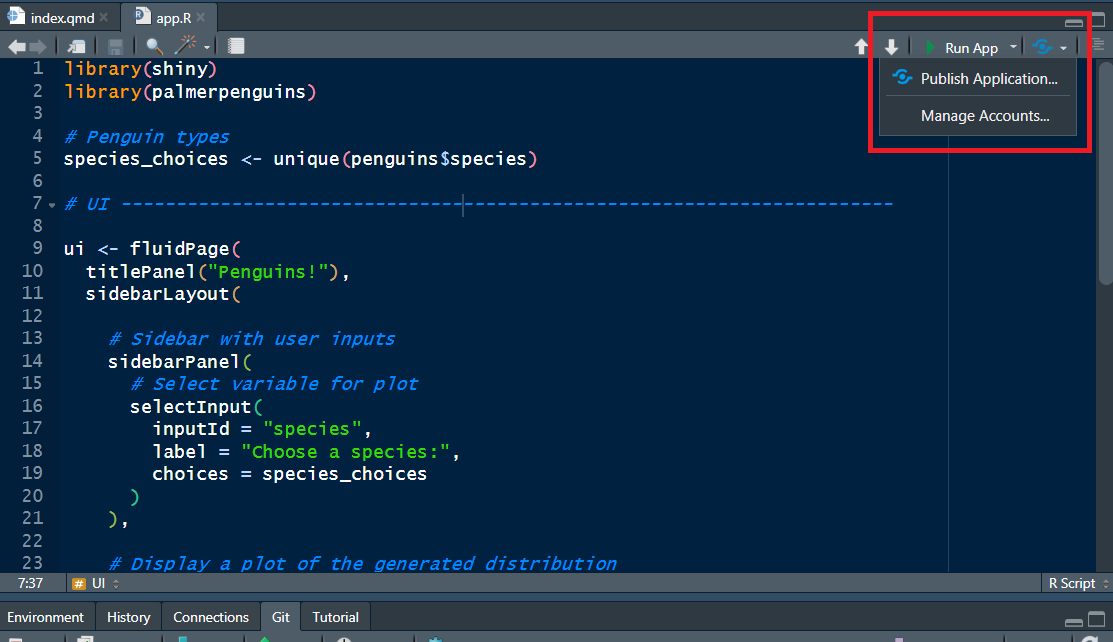
🔗 Launch R: run
shiny::runExample("01_hello").

Deploying a Shiny app
What do we mean by deployment?
- Getting the Shiny app off your laptop and out into the world!
- Traditional deployment
- We need a server to run the R code:
- shinyapps.io
- Posit Connect
- Private server (e.g. university)
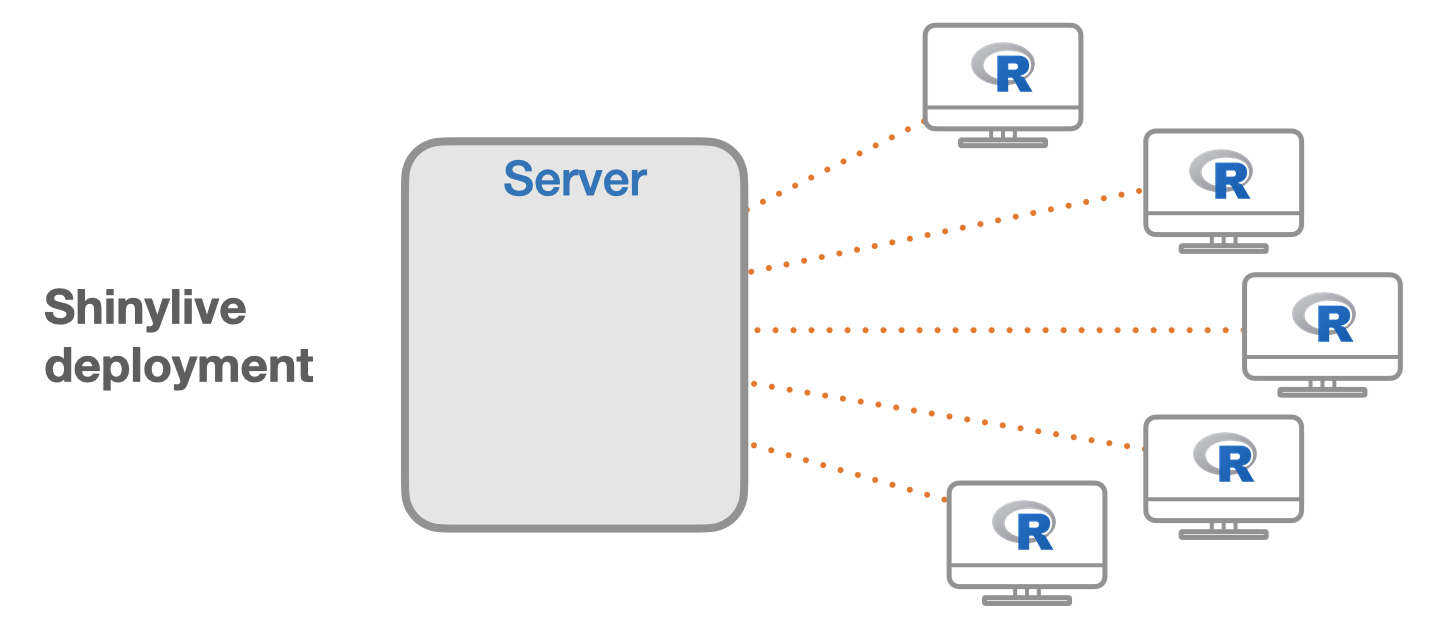
Shinylive deployment

Hands-on Exercises (30 min)
Q&A
Thank You
- Happy coding with Shiny!
![]()